This episode is freely available thanks to the support of our subscribers

Subscribers get exclusive access to new and all previous subscriber-only episodes, video downloads, and 30% discount for team members. Become a Subscriber

We revisit our SwiftUI flow layout implementation from 1.5 years ago and write a simpler and more correct version.

00:06 Today we'll take another stab at building a flow layout in SwiftUI. We think we can implement a better version of it — and in a simpler way — than when we discussed this topic a year and a half ago over the course of three episodes.

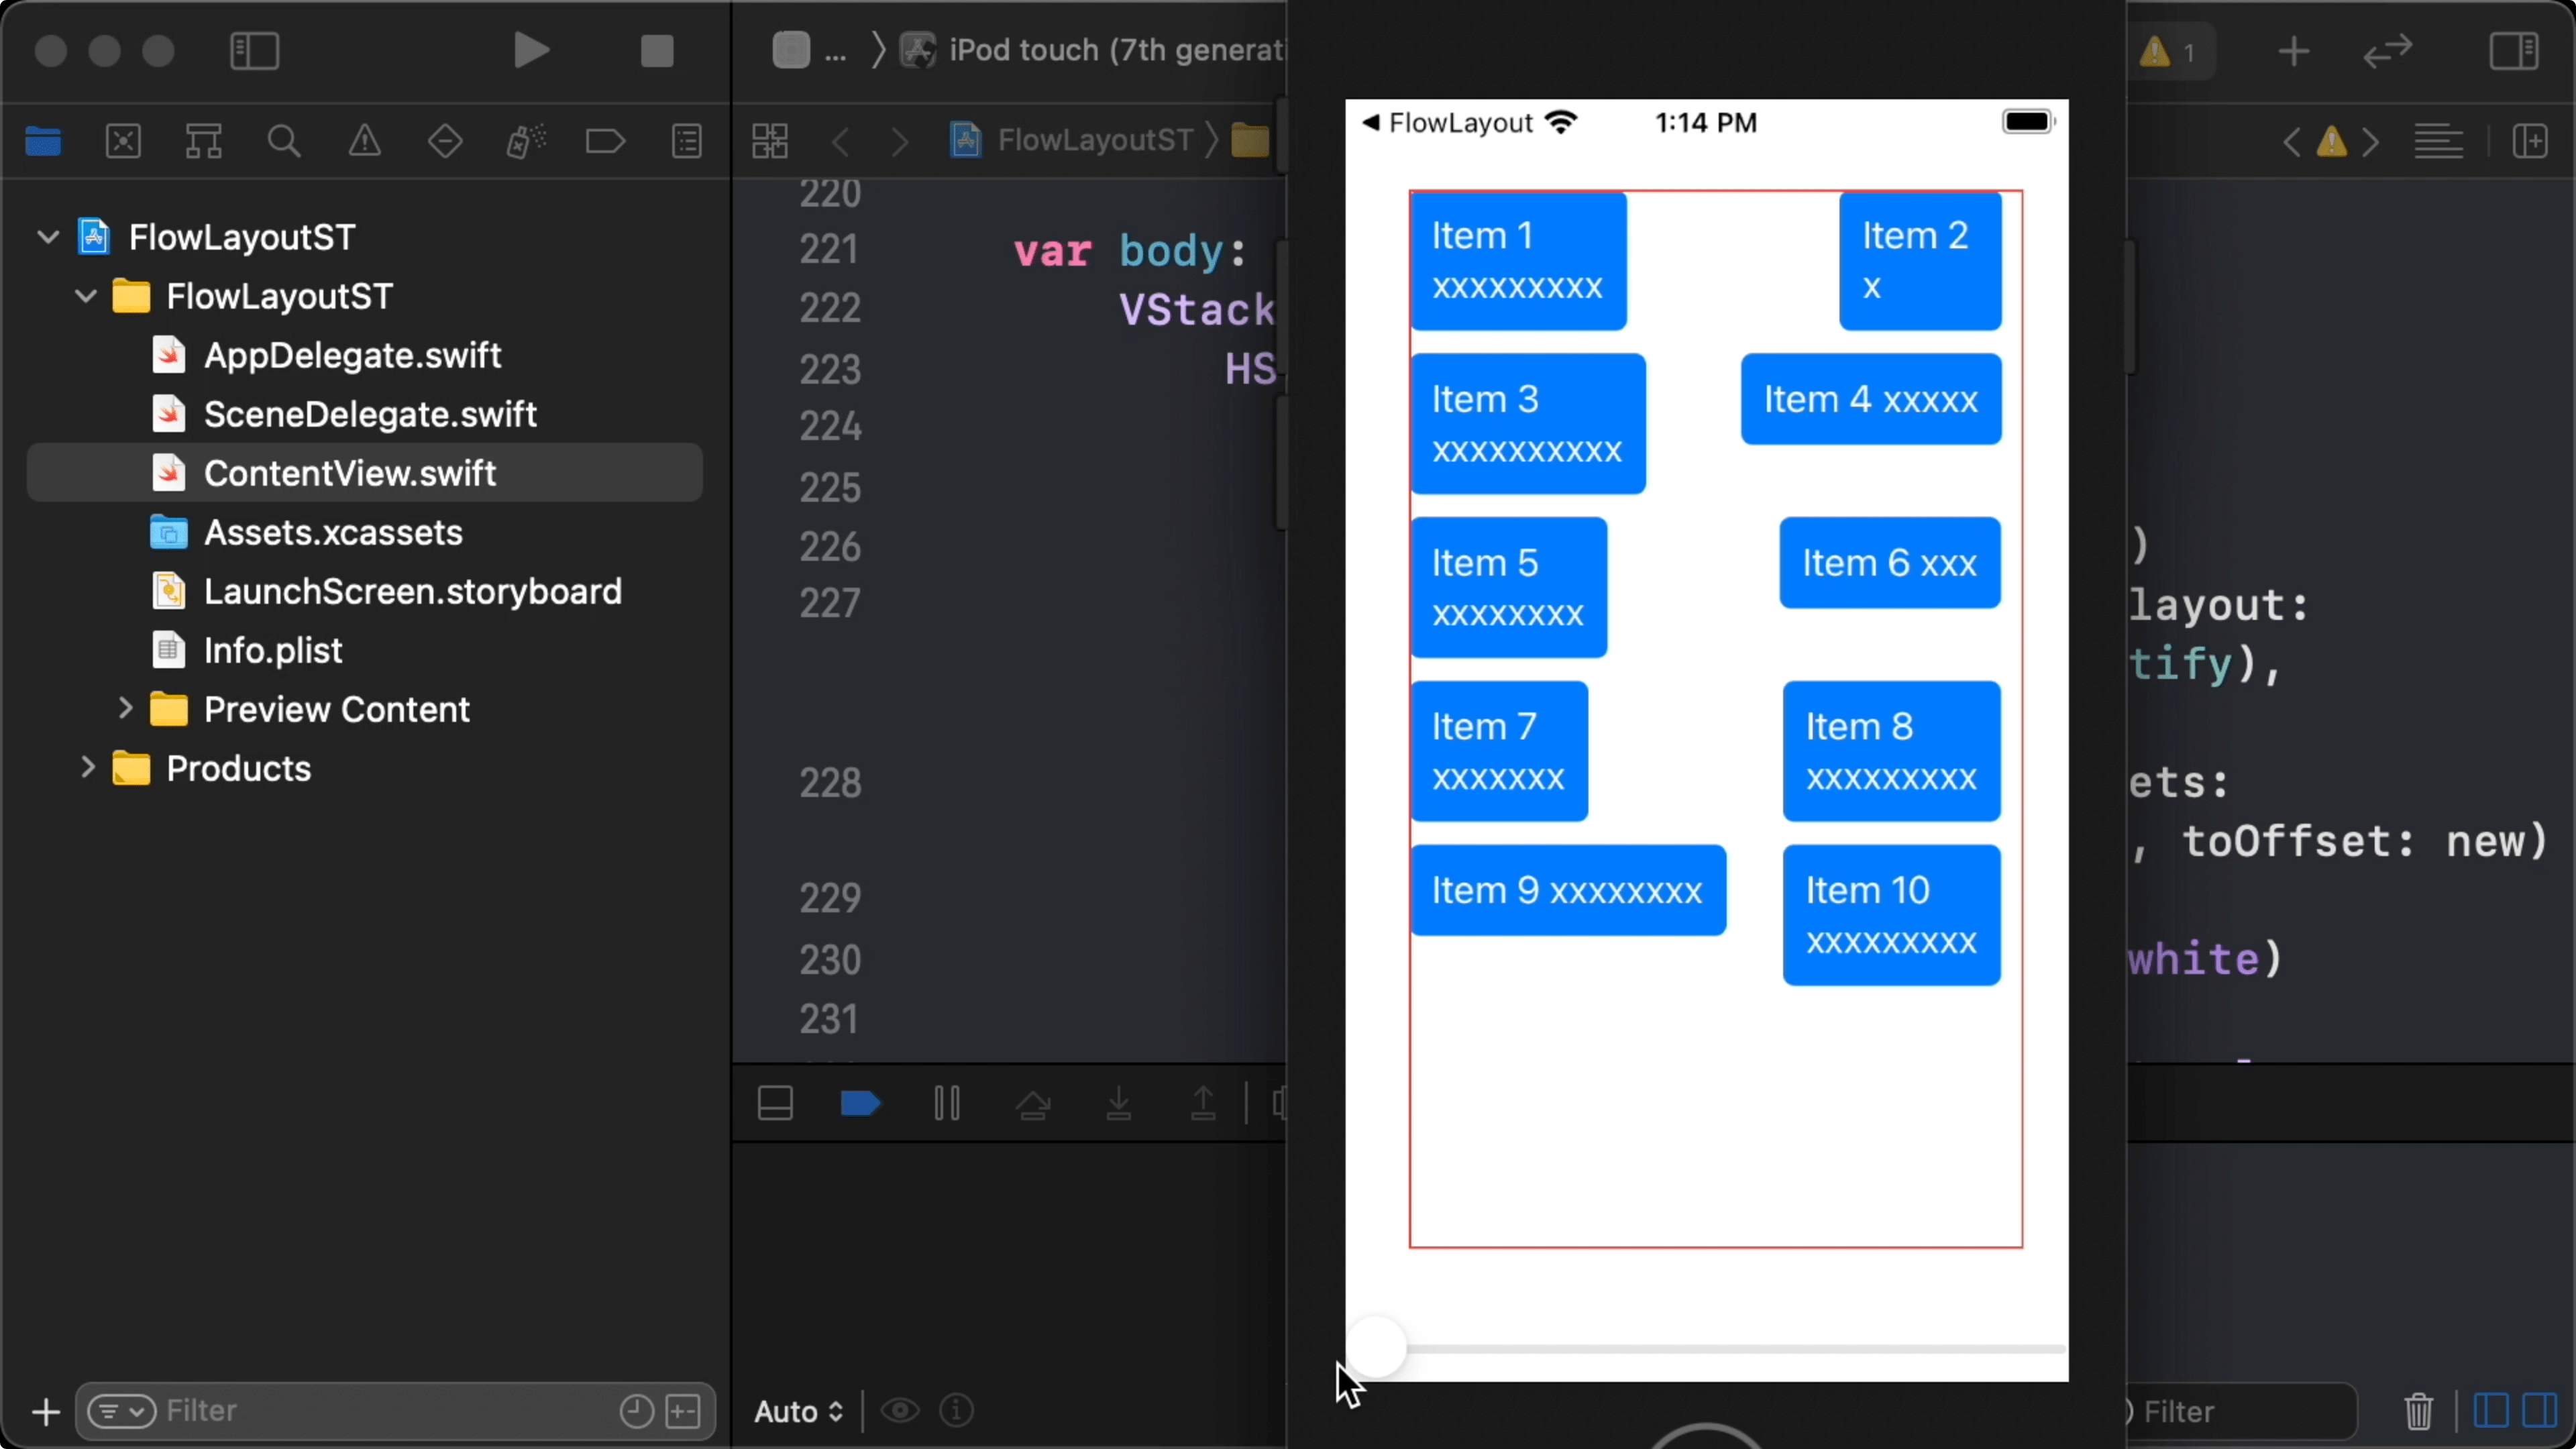
00:29 Let's first take a look at what we built back then. When we run the app in the simulator, we can control the container's width using a slider and see how the flow layout behaves. If we add a red border around the layout, we see one of the issues with this implementation — the flow layout container's height doesn't match the content:

01:11 The border basically illustrates the proposed size for this flow layout. If we were to look at the implementation, we'd see that the outermost view is a geometry reader, which always takes on the proposed size in order to measure it.

01:29 An ideal version of this component would only use the proposed width, not allow the view to become any wider, and only let it become as high as it needs to fit around its contents. That way, the flow layout view could also work inside a scroll view. And it would become possible to place two instances below each other.

02:10 Besides having the geometry reader on the outside, there's also a problem in the way we measure the size of each item in the flow layout. We should propose a nil size to these items and then measure them, so that the measured size is constant and not dependent on the surrounding layout.

02:35 Another reason why the container's height doesn't match with its contents is that we're using offsets to place the items within a frame with a hardcoded size. When we offset a view, we draw it in a different place without influencing the rest of the layout, thus taking away the chance for the container view to adapt its size naturally to its contents.

Setting Up

03:34 Let's start working on a new implementation. The only thing we're keeping from the previous version is an array of random strings, which serve as the data elements for the flow layout's items:

struct ContentView: View {
    @State var strings: [String] = (1...10).map { "Item \($0) " + (Bool.random() ? "\n" : "")  + String(repeating: "x", count: Int.random(in: 0...10)) }

    var body: some View {

    }
}

03:59 We set up a new FlowLayout view, and we add in a zero-height geometry reader to measure the view's proposed width. We place this geometry reader at the top of a VStack, and we set the stack view's spacing to zero so that there's no visible hint of the geometry reader. Below the geometry reader in the VStack, we add a ZStack to house the view's visible contents:

struct FlowLayout: View {
    var body: some View {
        VStack(spacing: 0) {
            GeometryReader { proxy in
                
            }
            .frame(height: 0)
            ZStack(alignment: .topLeading) {
                
            }
        }
    }
}

05:14 We want to propagate the measured width up from the geometry reader, so we need a preference key that can store a CGSize. Since we're also going to need to aggregate sizes from the items in the ZStack and propagate them up through the preference system, we immediately choose an array of sizes — [CGSize] — as the key's type. That way, we can use the same key in both places:

struct SizeKey: PreferenceKey {
    static let defaultValue: [CGSize] = []
    static func reduce(value: inout Value, nextValue: () -> Value) {
        value.append(contentsOf: nextValue())
    }
}

06:39 Using the preference key, we store the measured size from the geometry reader's closure. Outside the geometry reader, we listen for changes to the preference and, for now, print out the received size to test that it works:

struct FlowLayout: View {
    var body: some View {
        VStack(spacing: 0) {
            GeometryReader { proxy in
                Color.clear.preference(key: SizeKey.self, value: [proxy.size])
            }
            .onPreferenceChange(SizeKey.self) {
                print($0)
            }
            .frame(height: 0)
            ZStack(alignment: .topLeading) {
                
            }
        }
    }
}

07:21 We add a FlowLayout view to the ContentView, and we wrap it in a frame that can become as large as the window wants to be:

struct ContentView: View {
    @State var strings: [String] = (1...10).map { "Item \($0) " + (Bool.random() ? "\n" : "")  + String(repeating: "x", count: Int.random(in: 0...10)) }

    var body: some View {
        FlowLayout()
            .frame(maxWidth: .infinity, maxHeight: .infinity)
    }
}

Now that we have an empty view and we know its width, we can add in some item cells and calculate their layout.

Populating the Flow Layout

08:01 We add generic parameters to FlowLayout for the cell view type and for the type of the data element that goes into each cell. We also add two properties: an array of elements, and a function that takes an element and returns a cell. At some point, we'll probably want to animate the cells when the array of elements changes, and by constraining the element type to be Identifiable, we ensure there's a stable identifier to compare elements by:

struct FlowLayout<Element: Identifiable, Cell: View>: View {
    var items: [Element]
    var cell: (Element) -> Cell
    
    var body: some View {
        // ...
    }
}

09:08 We convert our sample string data into an array of Identifiable structs, and we pass this items array to the FlowLayout view, along with a function that produces a Text view with a blue background for a given item:

struct Item: Identifiable, Hashable {
    var id = UUID()
    var value: String
}

struct ContentView: View {
    @State var items: [Item] = (1...10).map { "Item \($0) " + (Bool.random() ? "\n" : "")  + String(repeating: "x", count: Int.random(in: 0...10)) }.map { Item(value: $0) }

    var body: some View {
        FlowLayout(items: items, cell: { item in 
            Text(item.value)
                .padding()
                .background(RoundedRectangle(cornerRadius: 5).fill(Color.blue))
        })
        .frame(maxWidth: .infinity, maxHeight: .infinity)
    }
}

10:10 In FlowLayout, we loop over the items and render them in the ZStack. For now, the text views all sit on top of each other:

struct FlowLayout<Element: Identifiable, Cell: View>: View {
    var items: [Element]
    var cell: (Element) -> Cell
    
    var body: some View {
        VStack(spacing: 0) {
            GeometryReader { proxy in
                Color.clear.preference(key: SizeKey.self, value: [proxy.size])
            }
            .onPreferenceChange(SizeKey.self) {
                print($0)
            }
            .frame(height: 0)
            ZStack(alignment: .topLeading) {
                ForEach(items) { item in
                    cell(item)
                }
            }
        }
    }
}

10:28 Next, we measure the size of each item by calling fixedSize on it and placing a geometry reader in a background view. We propagate the sizes up, and we collect them at the stack view level, storing them in a private state variable:

struct FlowLayout<Element: Identifiable, Cell: View>: View {
    var items: [Element]
    var cell: (Element) -> Cell
    @State private var sizes: [CGSize] = []
    
    var body: some View {
        VStack(spacing: 0) {
            GeometryReader { proxy in
                Color.clear.preference(key: SizeKey.self, value: [proxy.size])
            }
            .onPreferenceChange(SizeKey.self) {
                print($0)
            }
            .frame(height: 0)
            ZStack(alignment: .topLeading) {
                ForEach(items) { item in
                    cell(item)
                        .fixedSize()
                        .background(GeometryReader { proxy in
                            Color.clear.preference(key: SizeKey.self, value: [proxy.size])
                        })
                }
            }
            .onPreferenceChange(SizeKey.self, perform: { value in
                self.sizes = value
            })
        }
    }
}

11:35 In the previous version of this project, we also stored the IDs of items along with their sizes. It's undocumented, but the aggregated sizes seem to always be in the same order as the cells, so we can look up each cell's size by its index, and we don't need its ID.

Computing Layout

12:25 Next, we can use the measured sizes to compute a layout. We write a function that takes in the sizes, along with a spacing parameter. It returns an array of CGPoints, with each point representing the coordinates of the top-leading corner of a view. The returned array of points has the same number of elements as the given array of sizes, and the corresponding size and point use the same index.

13:20 To compute the points, we can first create a layout that places all items on a single line. We keep track of a point and we loop over the sizes, appending the current point to the result array, and then incrementing it with the current size's width plus the spacing:

func layout(sizes: [CGSize], spacing: CGSize = .init(width: 10, height: 10)) -> [CGPoint] {
    var currentPoint: CGPoint = .zero
    var result: [CGPoint] = []
    for size in sizes {
        result.append(currentPoint)
        currentPoint.x += size.width + spacing.width
    }
    return result
}

14:12 We call layout in the body of FlowLayout:

struct FlowLayout<Element: Identifiable, Cell: View>: View {
    var items: [Element]
    var cell: (Element) -> Cell
    @State private var sizes: [CGSize] = []
    
    var body: some View {
        let laidout = layout(sizes: sizes)
        
        VStack(spacing: 0) {
            // ...
        }
    }
}

14:29 Before, we rendered each item at a calculated offset. But by using alignment guides instead of offsets, we let the layout system place the items, allowing the ZStack to automatically grow with its contents:

struct FlowLayout<Element: Identifiable, Cell: View>: View {
    var items: [Element]
    var cell: (Element) -> Cell
    @State private var sizes: [CGSize] = []
    
    var body: some View {
        let laidout = layout(sizes: sizes)
        
        return VStack(spacing: 0) {
            GeometryReader { proxy in
                Color.clear.preference(key: SizeKey.self, value: [proxy.size])
            }
            .onPreferenceChange(SizeKey.self) {
                print($0)
            }
            .frame(height: 0)
            ZStack(alignment: .topLeading) {
                ForEach(items) { item in
                    cell(item)
                        .fixedSize()
                        .background(GeometryReader { proxy in
                            Color.clear.preference(key: SizeKey.self, value: [proxy.size])
                        })
                        .alignmentGuide(.leading, computeValue: { dimension in
                            // ...
                        })
                        .alignmentGuide(.top, computeValue: { dimension in
                            // ...
                        })
                }
            }
            .onPreferenceChange(SizeKey.self, perform: { value in
                self.sizes = value
            })
        }
    }
}

15:32 To set the horizontal and vertical alignment guides of an item, we need to look up the computed point for that item in the laidout array. So we need to know the index of the current item.

15:47 We zip the items with their indices. We could also use enumerated instead of zipping, but using the actual indices makes the iteration work with any type of collection. That gives us an array of tuples, with each tuple holding an item and an index, and we need to tell the ForEach how to identify these tuples by specifying the key path from a tuple to the item identifier:

ForEach(Array(zip(items, items.indices)), id: \.0.id) { (item, index) in
    // ...
}

16:32 Now we can compute the alignment guides by looking up the item's point in the laidout array. But the array might still be empty when the view is first laid out, and if it is, we should return 0 for the alignment guide. Otherwise, we use the point's x coordinate to set the item's leading alignment guide. To move an item to the right, its leading alignment guide needs to move to the left, so we invert the x coordinate:

struct FlowLayout<Element: Identifiable, Cell: View>: View {
    var items: [Element]
    var cell: (Element) -> Cell
    @State private var sizes: [CGSize] = []
    
    var body: some View {
        let laidout = layout(sizes: sizes)
        
        return VStack(spacing: 0) {
            GeometryReader { proxy in
                Color.clear.preference(key: SizeKey.self, value: [proxy.size])
            }
            .onPreferenceChange(SizeKey.self) {
                print($0)
            }
            .frame(height: 0)
            ZStack(alignment: .topLeading) {
                ForEach(Array(zip(items, items.indices)), id: \.0.id) { (item, index) in
                    cell(item)
                        .fixedSize()
                        .background(GeometryReader { proxy in
                            Color.clear.preference(key: SizeKey.self, value: [proxy.size])
                        })
                        .alignmentGuide(.leading, computeValue: { dimension in
                            guard !laidout.isEmpty else { return 0 }
                            return -laidout[index].x
                        })
                        .alignmentGuide(.top, computeValue: { dimension in
                            guard !laidout.isEmpty else { return 0 }
                            return -laidout[index].y
                        })
                }
            }
            .onPreferenceChange(SizeKey.self, perform: { value in
                self.sizes = value
            })
        }
    }
}

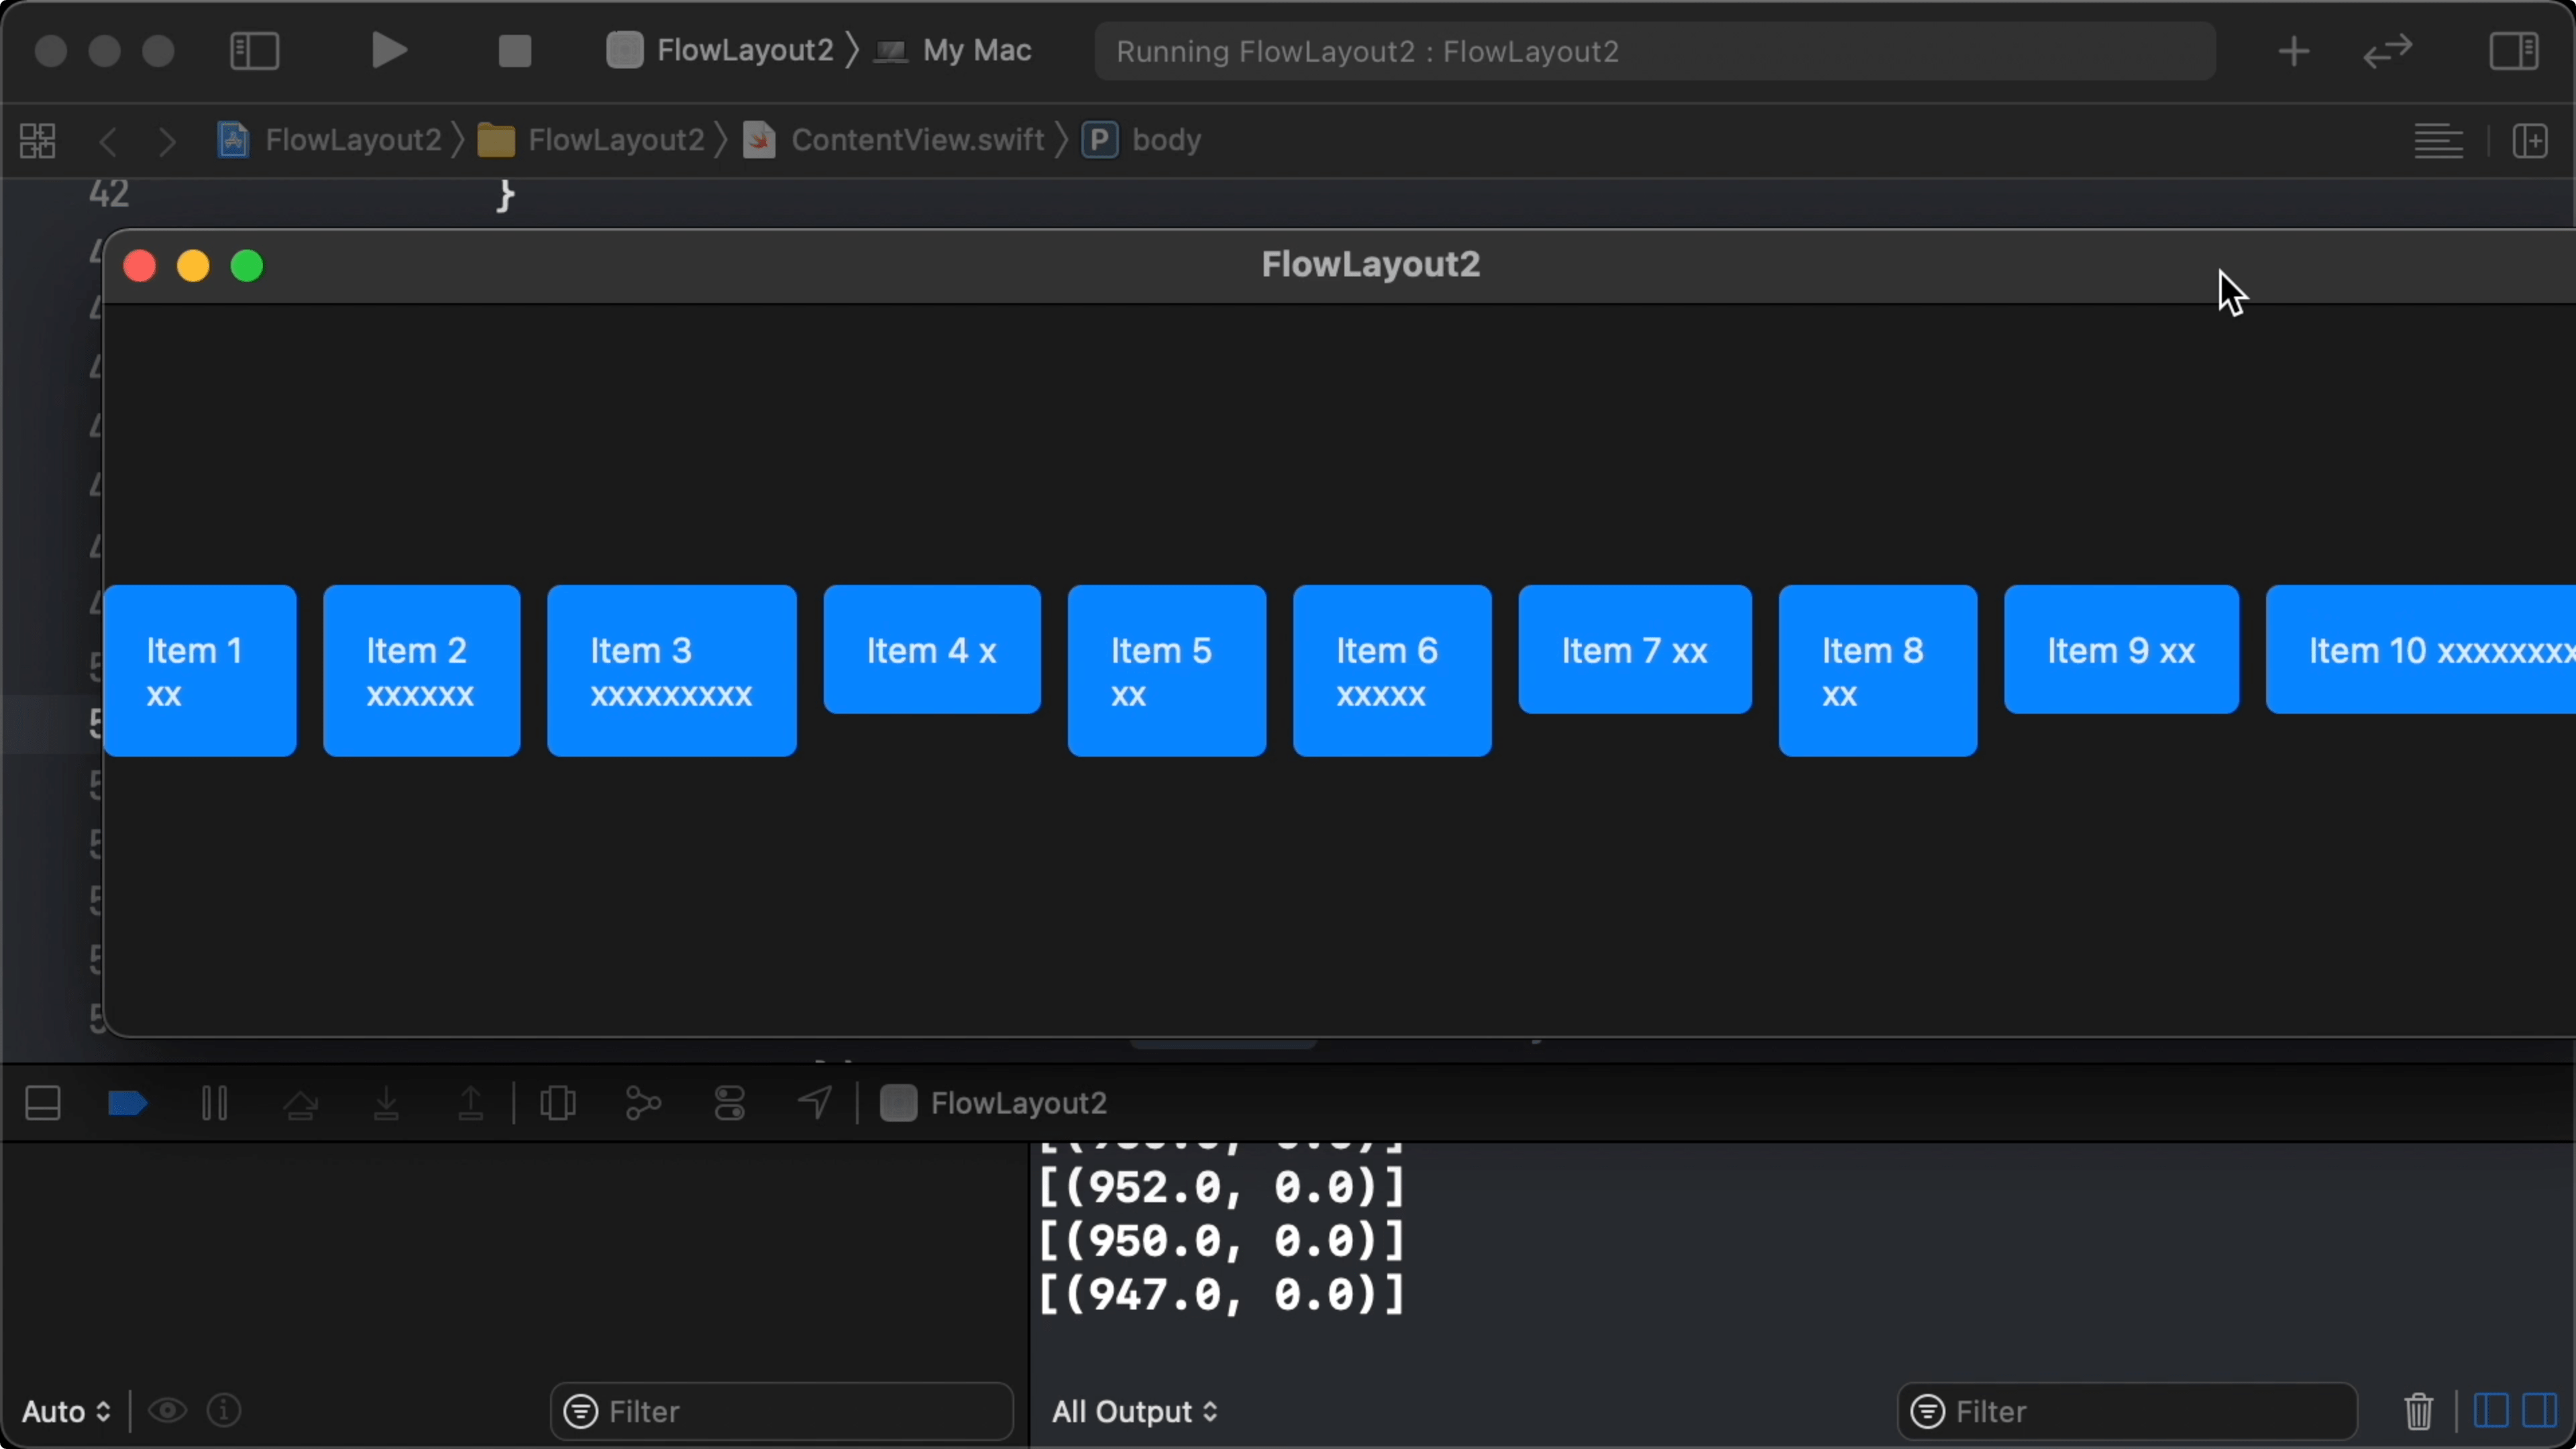
18:09 Since the layout function places the items in a single line, the items are all laid out horizontally:

18:27 For the layout function to create multiple lines, it needs to know the available width. So we store the measured width from the container's geometry reader, and we pass it to layout as an additional parameter:

func layout(sizes: [CGSize], spacing: CGSize = .init(width: 10, height: 10), containerWidth: CGFloat) -> [CGPoint] {
    // ...
}

struct FlowLayout<Element: Identifiable, Cell: View>: View {
    var items: [Element]
    var cell: (Element) -> Cell
    @State private var sizes: [CGSize] = []
    @State private var containerWidth: CGFloat = 0
    
    var body: some View {
        let laidout = layout(sizes: sizes, containerWidth: containerWidth)
        
        return VStack(spacing: 0) {
            GeometryReader { proxy in
                Color.clear.preference(key: SizeKey.self, value: [proxy.size])
            }
            .onPreferenceChange(SizeKey.self) { value in
                self.containerWidth = value[0].width
            }
            .frame(height: 0)
            // ...
        }
    }
}

19:43 Before we append a point to the result array inside layout, we check that the sum of the current x position and the current size doesn't exceed the available width. If it does, we have to wrap to the next line by resetting the current point's x to zero, and by adding the current line's height to its y position:

func layout(sizes: [CGSize], spacing: CGSize = .init(width: 10, height: 10), containerWidth: CGFloat) -> [CGPoint] {
    var currentPoint: CGPoint = .zero
    var result: [CGPoint] = []
    var lineHeight: CGFloat = 0
    for size in sizes {
        if currentPoint.x + size.width > containerWidth {
            currentPoint.x = 0
            currentPoint.y += lineHeight + spacing.height
        }
        result.append(currentPoint)
        currentPoint.x += size.width + spacing.width
        lineHeight = max(lineHeight, size.height)
    }
    return result
}

Finishing Touches

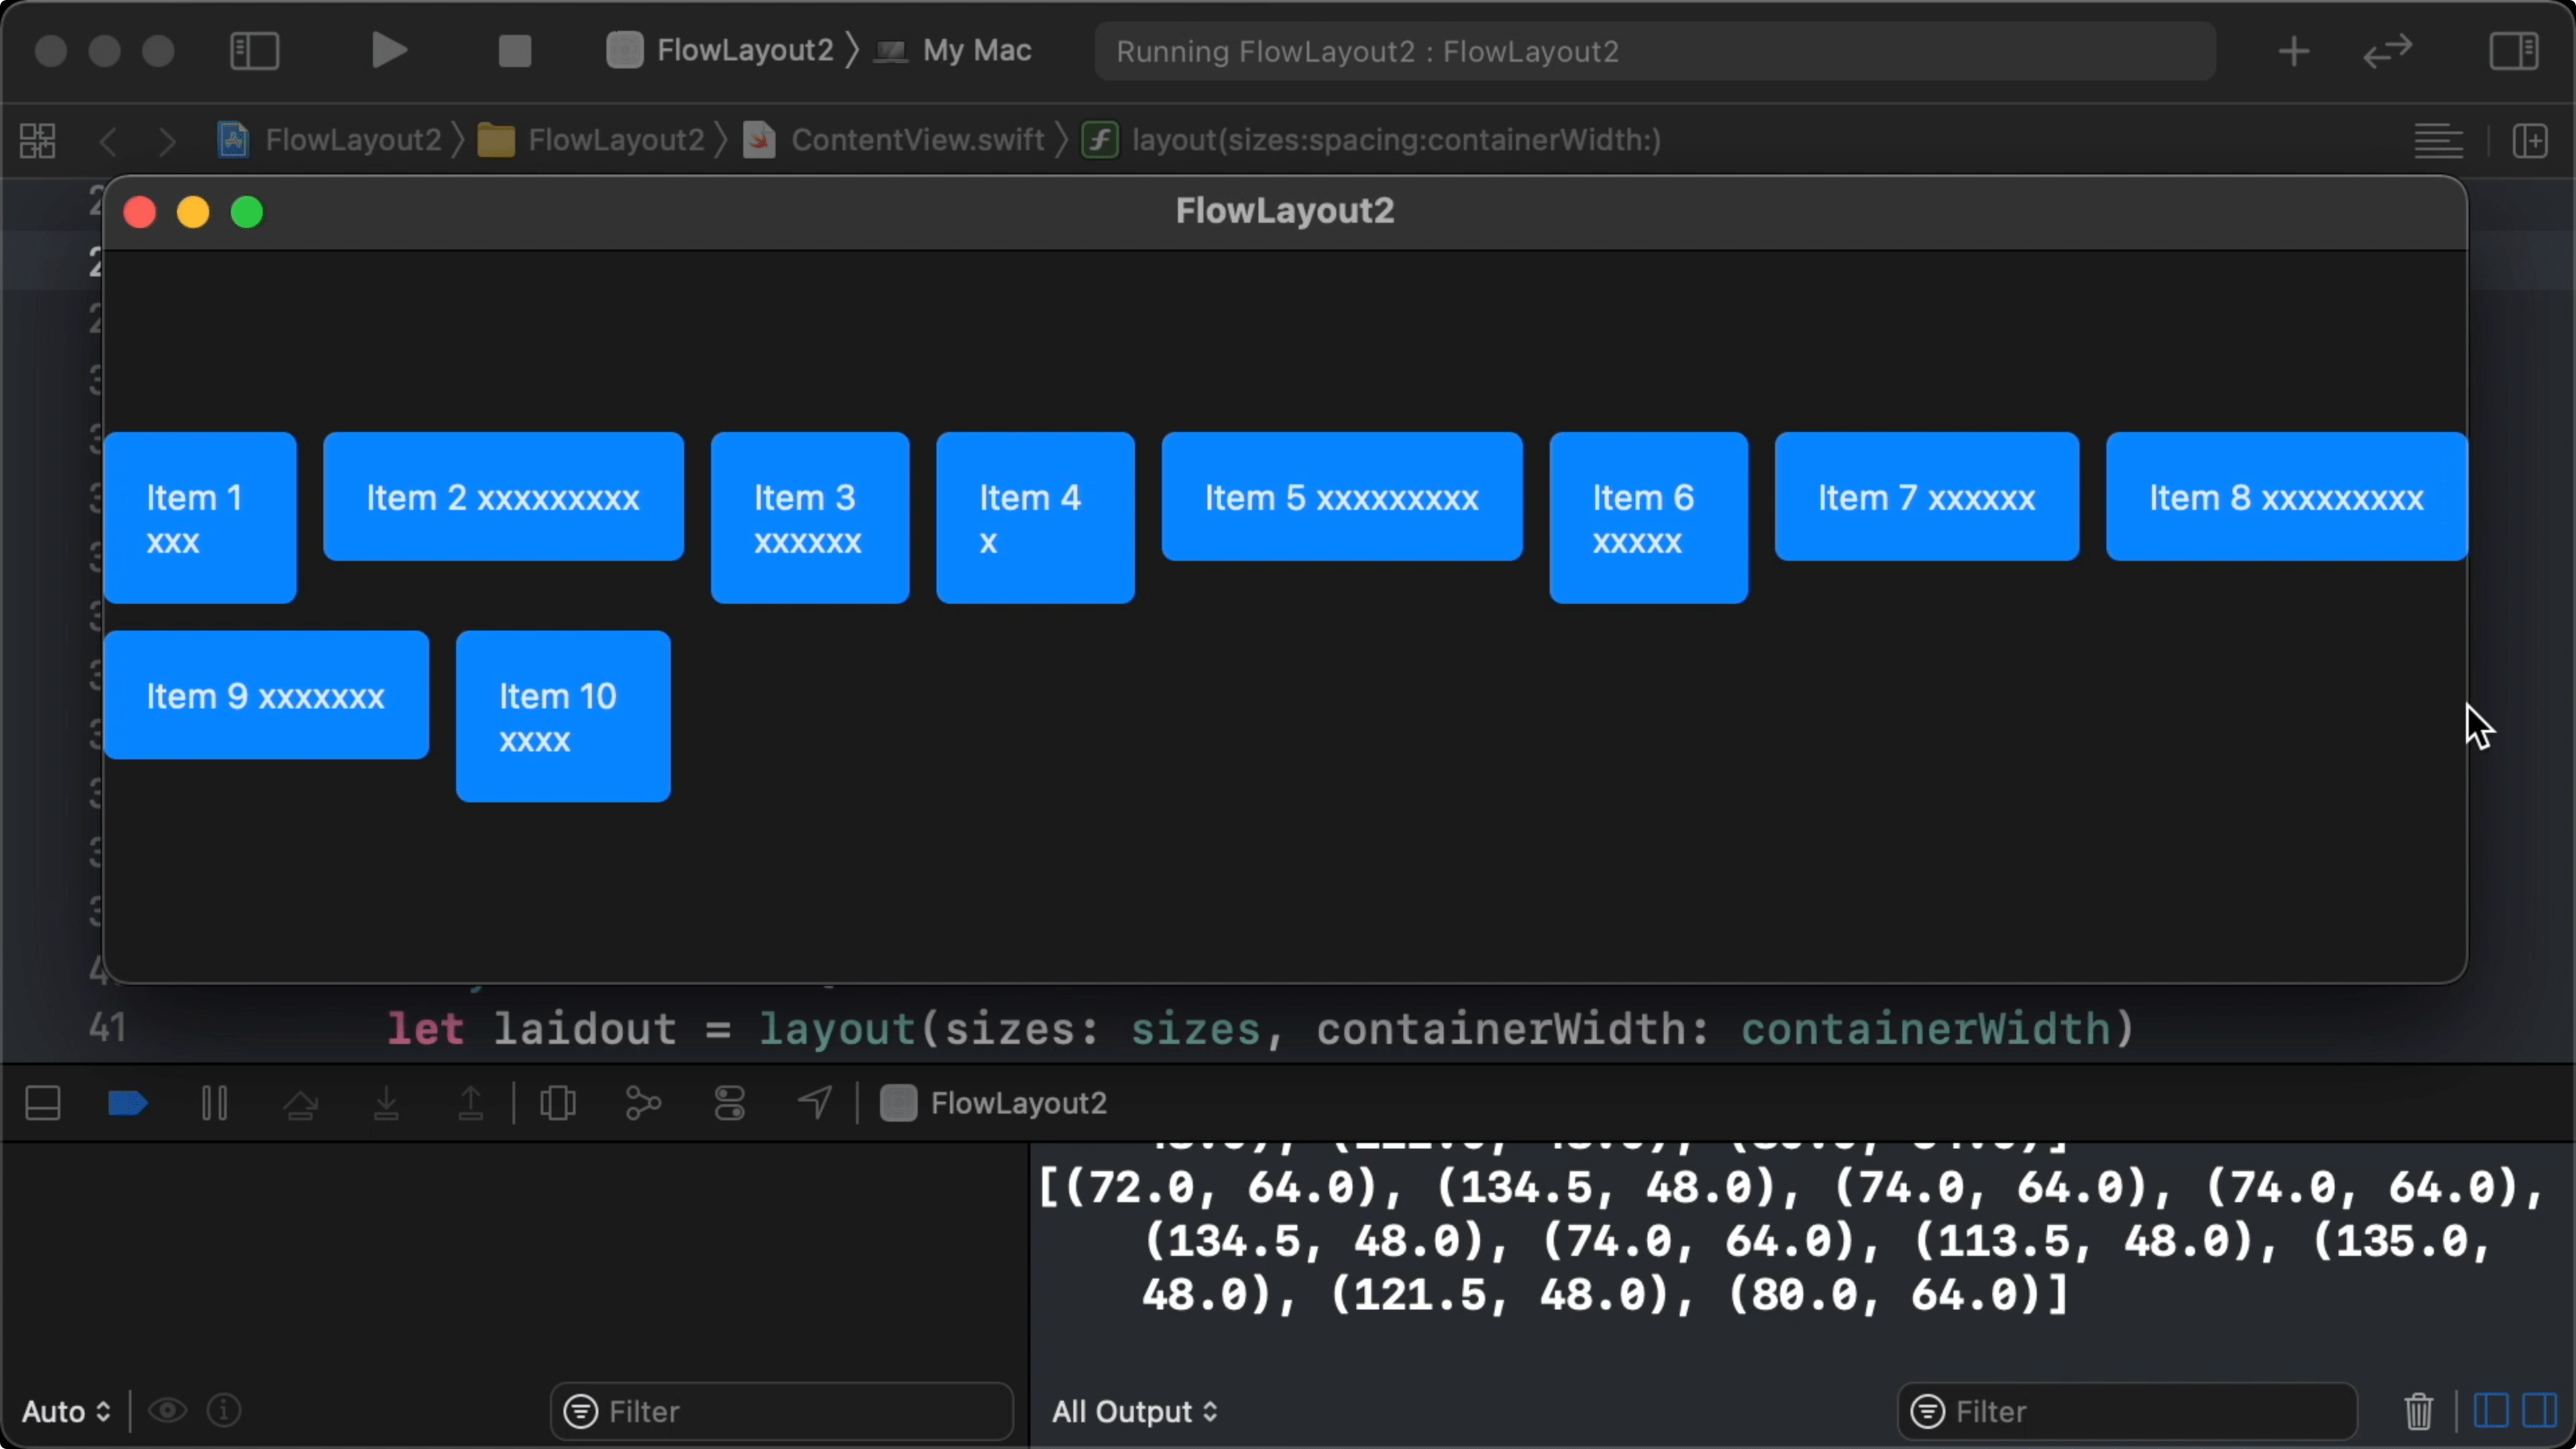
21:28 The app now launches with two lines of items. But there's still a problem. If we make the window smaller, we expect the flow layout to move items to the next line if they stop fitting on their current one. This doesn't happen, and we can only make the window as small as the initial layout:

21:46 By giving the ZStack a flexible frame with a minimum width of 0 and a maximum width of .infinity, it always becomes as wide as proposed:

struct FlowLayout<Element: Identifiable, Cell: View>: View {
    var items: [Element]
    var cell: (Element) -> Cell
    @State private var sizes: [CGSize] = []
    @State private var containerWidth: CGFloat = 0
    
    var body: some View {
        let laidout = layout(sizes: sizes, containerWidth: containerWidth)
        
        return VStack(spacing: 0) {
            // ...
            ZStack(alignment: .topLeading) {
                // ...
            }
            .onPreferenceChange(SizeKey.self, perform: { value in
                self.sizes = value
            })
            .frame(minWidth: 0, maxWidth: .infinity)
        }
    }
}

22:24 In our SwiftUI Layout Explained series, we reimplement the flexible frame and find out why it works this way.

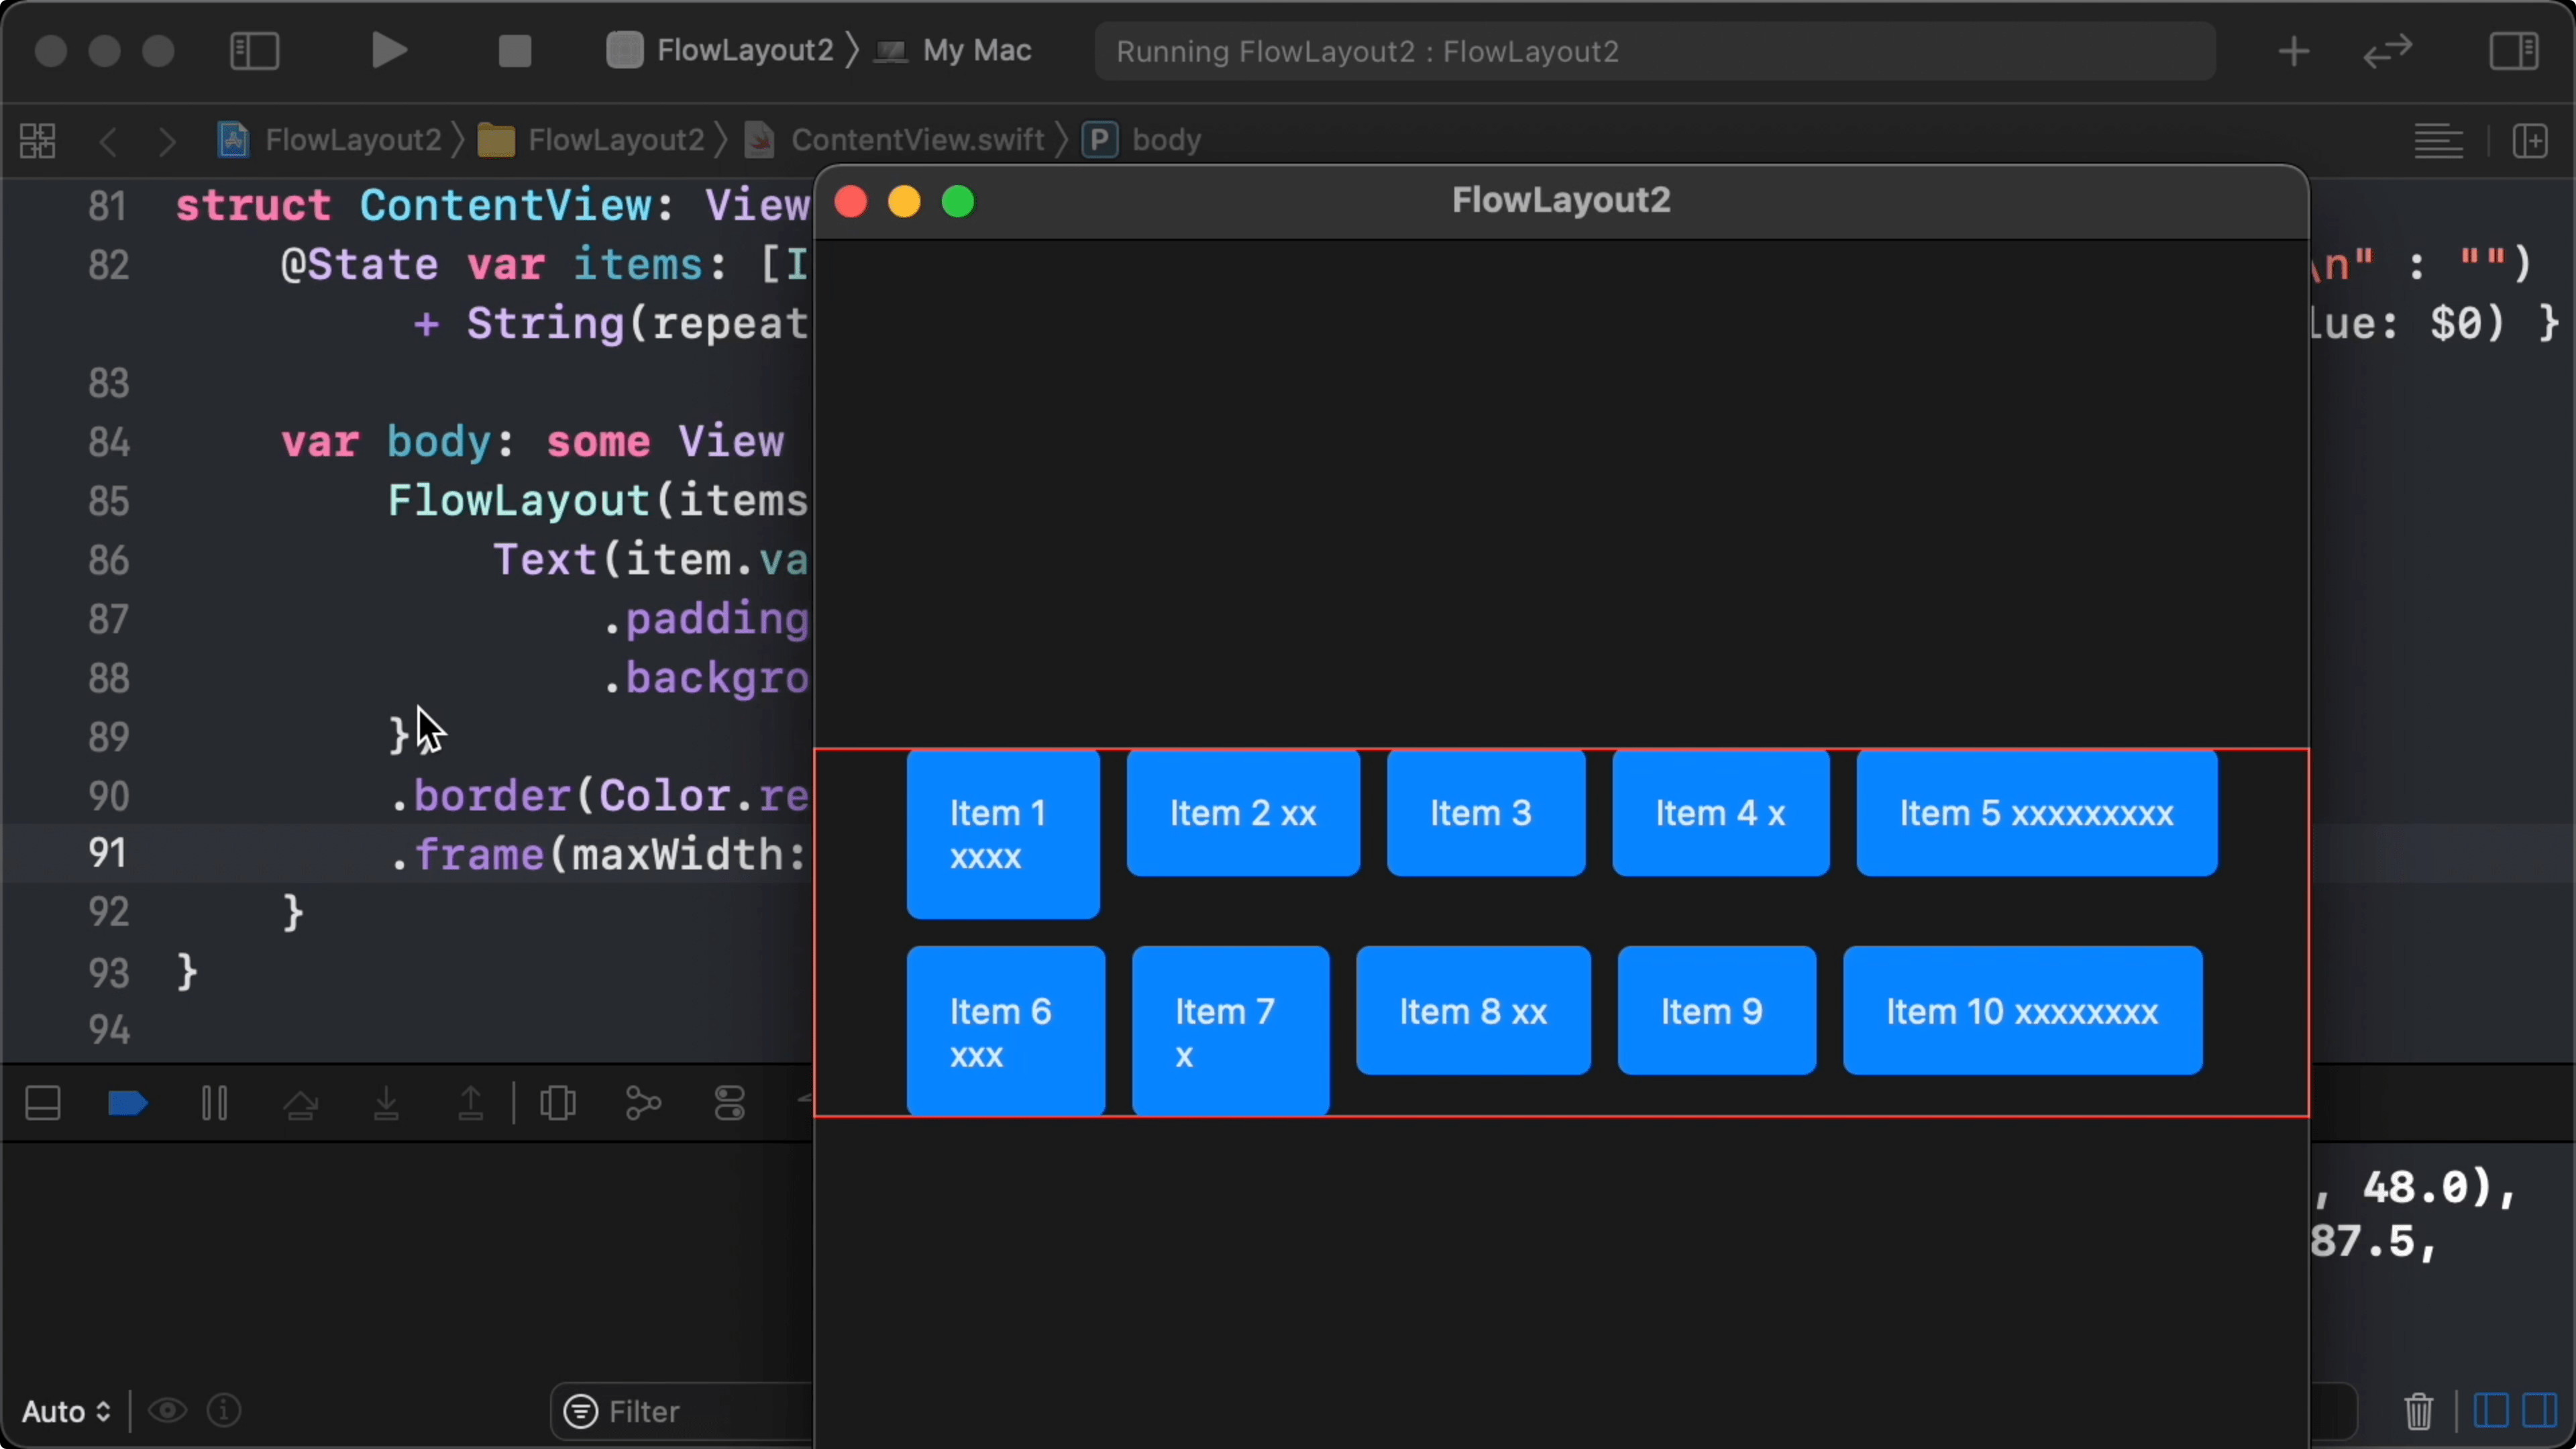
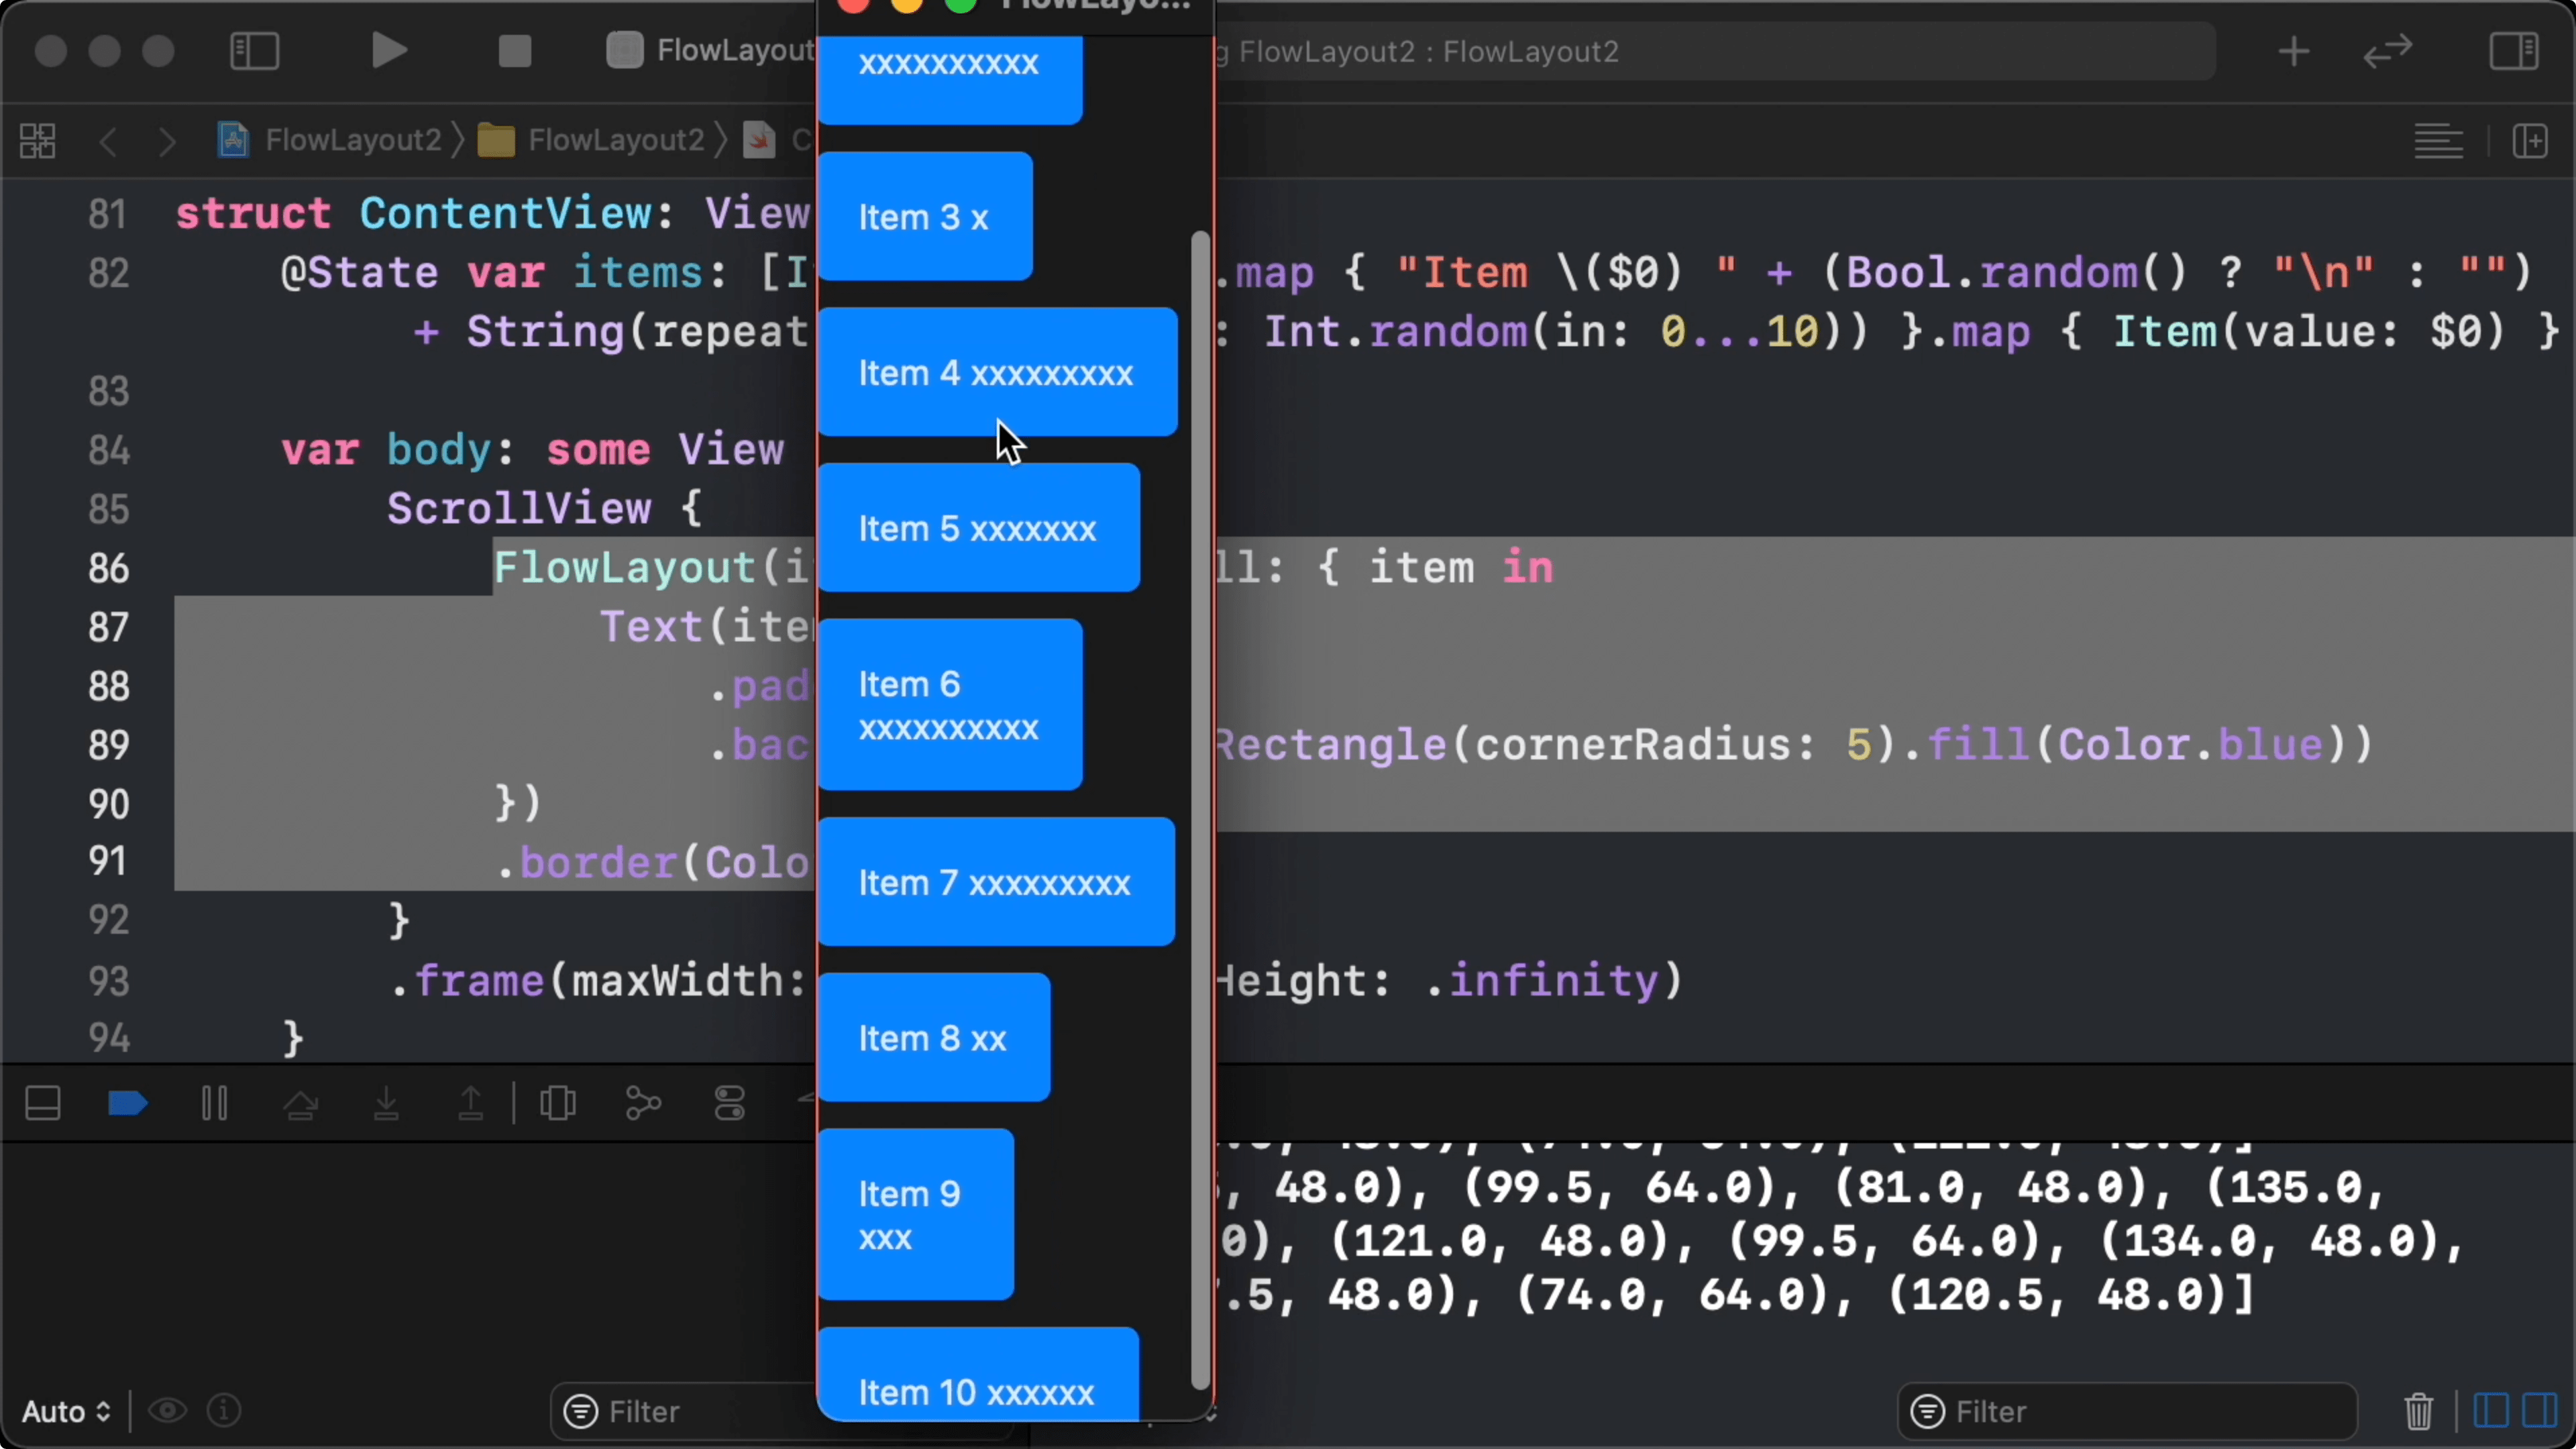
22:42 Now we can resize the window, and the items reflow to fit inside the available width. When we put a border around the FlowLayout view, we can also see that it resizes itself to match the height of its content:

23:10 We set the alignments of both the ZStack and the flexible frame to .leading to align the items to the leading edge:

struct FlowLayout<Element: Identifiable, Cell: View>: View {
    var items: [Element]
    var cell: (Element) -> Cell
    @State private var sizes: [CGSize] = []
    @State private var containerWidth: CGFloat = 0
    
    var body: some View {
        let laidout = layout(sizes: sizes, containerWidth: containerWidth)
        
        return VStack(alignment: .leading, spacing: 0) {
            // ...
            ZStack(alignment: .topLeading) {
                // ...
            }
            .onPreferenceChange(SizeKey.self, perform: { value in
                self.sizes = value
            })
            .frame(minWidth: 0, maxWidth: .infinity, alignment: .leading)
        }
    }
}

23:49 When we put the FlowLayout in a vertical ScrollView, we can see that it scrolls exactly to the bottom of the last item:

struct ContentView: View {
    @State var items: [Item] = (1...10).map { "Item \($0) " + (Bool.random() ? "\n" : "")  + String(repeating: "x", count: Int.random(in: 0...10)) }.map { Item(value: $0) }

    var body: some View {
        ScrollView {
            FlowLayout(items: items, cell: { item in
                Text(item.value)
                    .padding()
                    .background(RoundedRectangle(cornerRadius: 5).fill(Color.blue))
            })
            .border(Color.red)
        }
        .frame(maxWidth: .infinity, maxHeight: .infinity)
    }
}

What's Next

24:21 It could be interesting to see if we can make the ZStack only as wide as it needs to be, instead of always taking on the proposed width. We could experiment with this in the future.

24:50 It's important to note that FlowLayout computes its layout eagerly, so it isn't a good replacement for a collection view, nor is it comparable to List or LazyVStack. It's difficult to build a LazyFlowLayout, because we don't really have the proper primitives to do so in SwiftUI. It might be possible by using LazyVStack with lines of items, but that comes with other difficulties that we'd need to investigate further.

25:30 But the current implementation works much better than the previous one. And we're curious where we'll be able to take it a year and a half into the future.

Resources

  • Sample Code

    Written in Swift 5.3

  • Episode Video

    Become a subscriber to download episode videos.

In Collection

170 Episodes · 59h29min

See All Collections

Episode Details

Recent Episodes

See All

Unlock Full Access

Subscribe to Swift Talk

  • Watch All Episodes

    A new episode every week

  • icon-benefit-download Created with Sketch.

    Download Episodes

    Take Swift Talk with you when you're offline

  • Support Us

    With your help we can keep producing new episodes